Cheap and Cute Halloween Decorations for Classrooms
Halloween is the perfect time to transform your classroom into a spooky, fun, and festive space—without breaking the bank. From DIY paper garlands and flying bats to popsicle stick cobwebs and cardboard roll spiders, these cheap and creative decorations are easy to make and sure to delight students of all ages. Get ready to add some Halloween magic to your classroom with simple, crafty ideas that bring the holiday spirit to life.
Paper Halloween Garlands
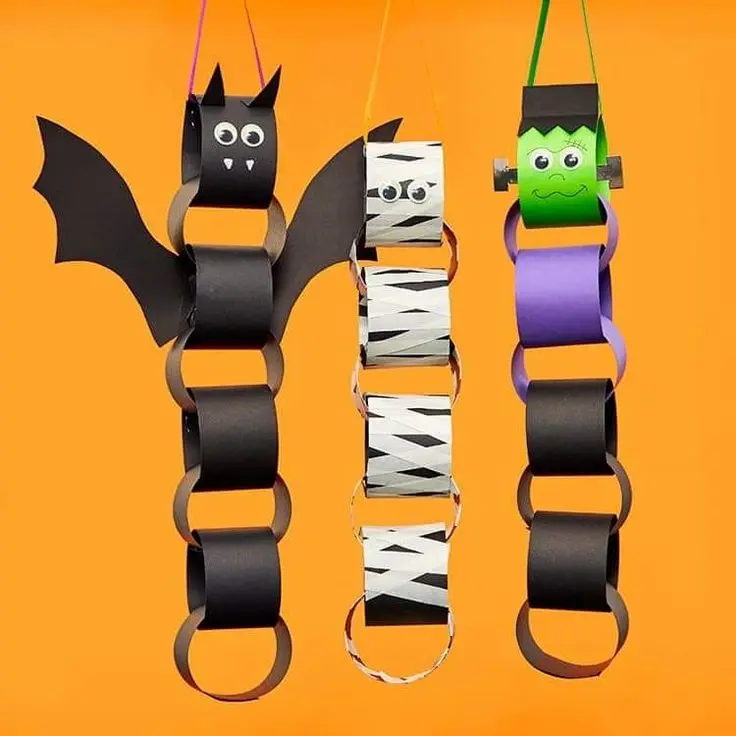
Photo credit: Kristen Spangler
Colorful paper garlands perfect for classroom walls or windows.
How to make:
- Cut wide strips of flexible cardboard.
- Create a chain by creating continuous loops.
- Decorate with eyes and ears to make a bat, add eyes and tape for a mummy.
- To create a Frankenstein effect, use purple card for the body and green card for the face, adding eyes and facial features to complete the look.
Hanging Halloween Bats
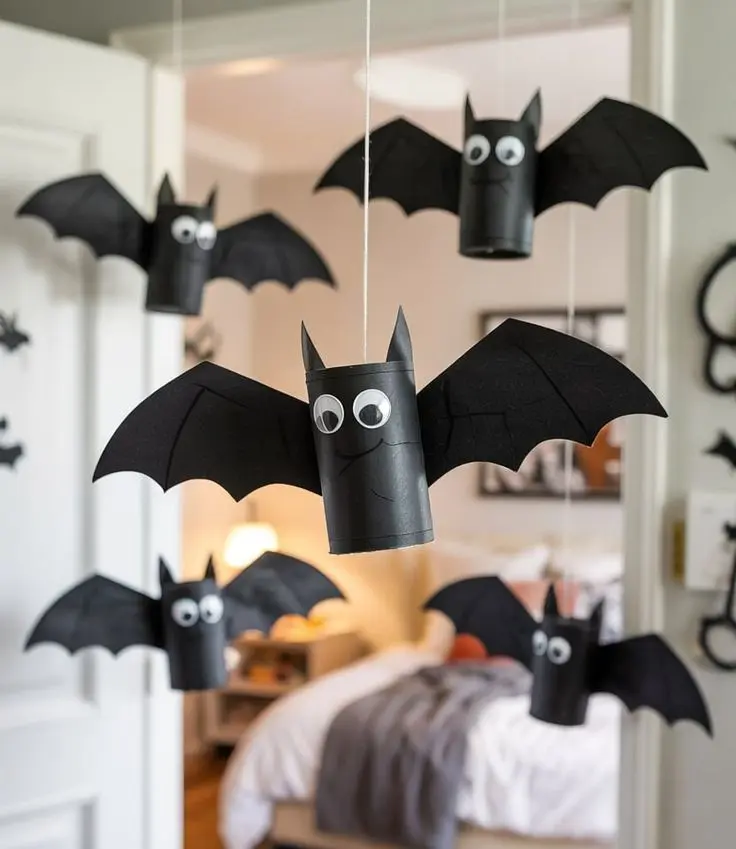
Image credit: Elizabeth
Cardboard roll bats suspended from the ceiling.
How to make:
- Cover cardboard rolls from cut paper-towel rolls or toilet paper rolls in black paper or paint it black.
- Cut and attach bat wings and add eyes.
- Stick string to inside of roll to hang.
Cardboard Roll Spider

Image credit: Nathalie
A fun and spooky spider decoration made from recycled cardboard rolls, perfect for hanging in classrooms.
How to make:
- Take an empty toilet paper or paper towel roll and paint it black.
- Cut 8 strips of black cardstock or pipe cleaners for legs and attach them to the roll.
- Add googly eyes or draw eyes with a marker.
- Hang from string or place on a shelf as part of your Halloween décor.
Popsicle Stick Cobweb Spiders
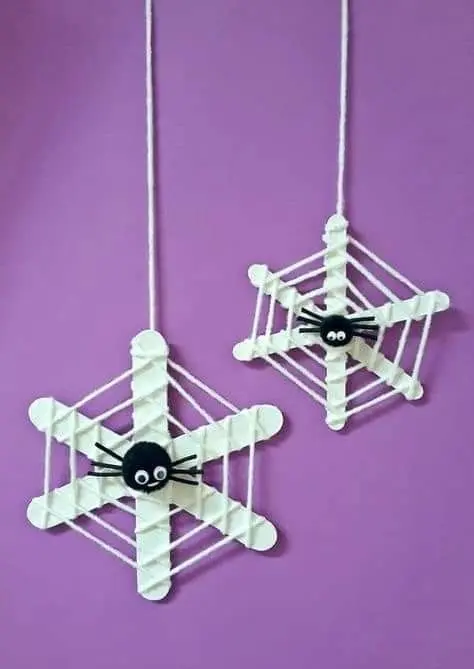
Image credit: Sondra Scofield
A cute and simple Halloween cobweb decoration made from popsicle sticks and string, perfect for classroom walls or windows.
How to make:
- Arrange 5–6 popsicle sticks in a star shape, overlapping at the center. Glue them together.
- Tie black or white yarn/string at the center and weave it around the sticks to create a web pattern.
- Optionally, add small paper spiders or beads for extra detail.
- Hang on walls, doors, or in windows for a spooky effect.
Spider with Rope and Stick Web
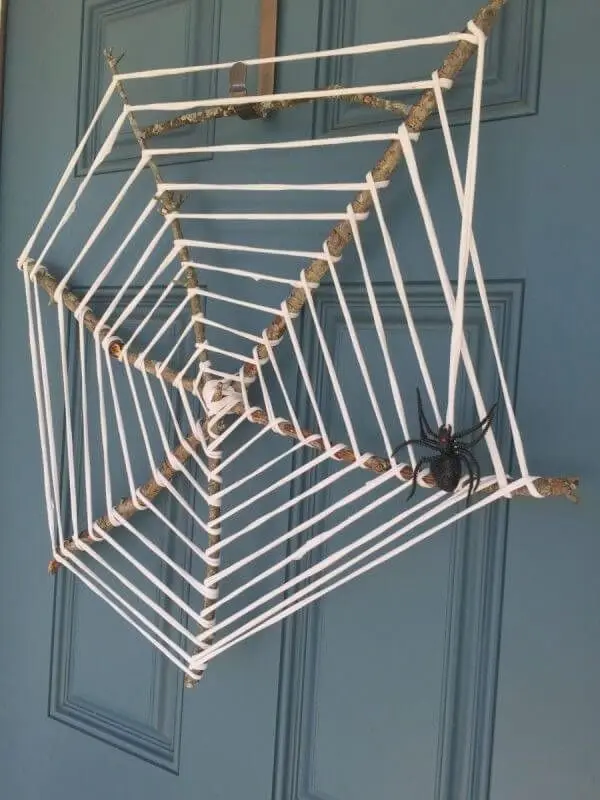
Image credit: Nea
A rustic and eye-catching spider decoration featuring a handmade web from rope and sticks, perfect for hanging in classrooms or on walls.
How to make:
- Collect several sticks of similar length and arrange them in a radial pattern to form the frame of the web. Secure the center with glue or string.
- Weave rope or twine around the sticks, spiraling outward to create a web pattern.
- Attach store bought spider or make one with felt and pipe cleaners to complete the look.
Twig Vase with Paper Bats
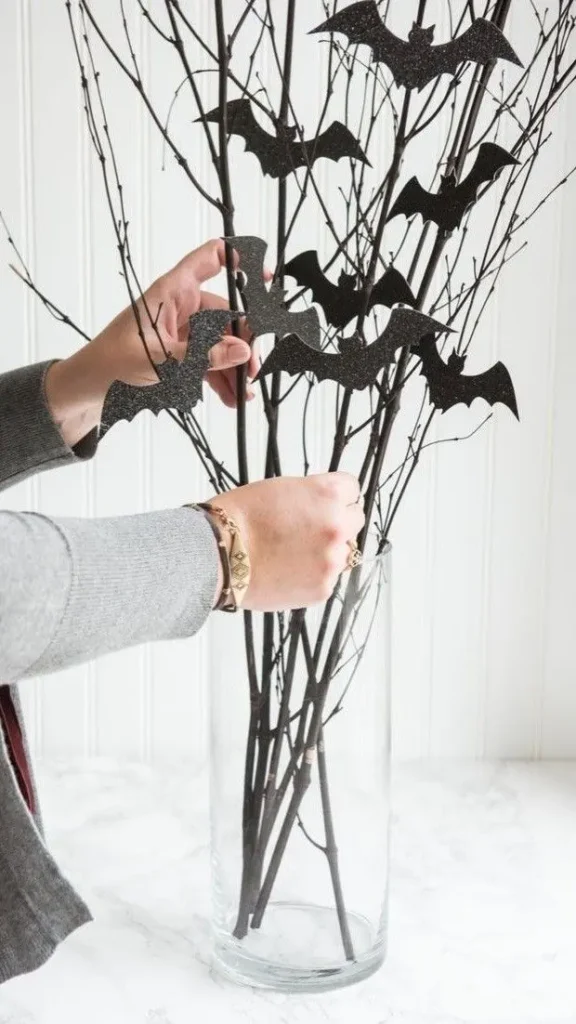
Image credit: Natasha
A simple and spooky centerpiece using natural sticks or twigs and flying paper bats, perfect for classroom tables or shelves.
How to make:
- Collect several twigs or small branches and arrange them in a vase. Optional: You can fill the base with stones or sand for stability.
- Cut bat shapes from black construction paper or cardstock.
- Attach the bats to the twigs using small balls of blu tack.
Mummy Jars
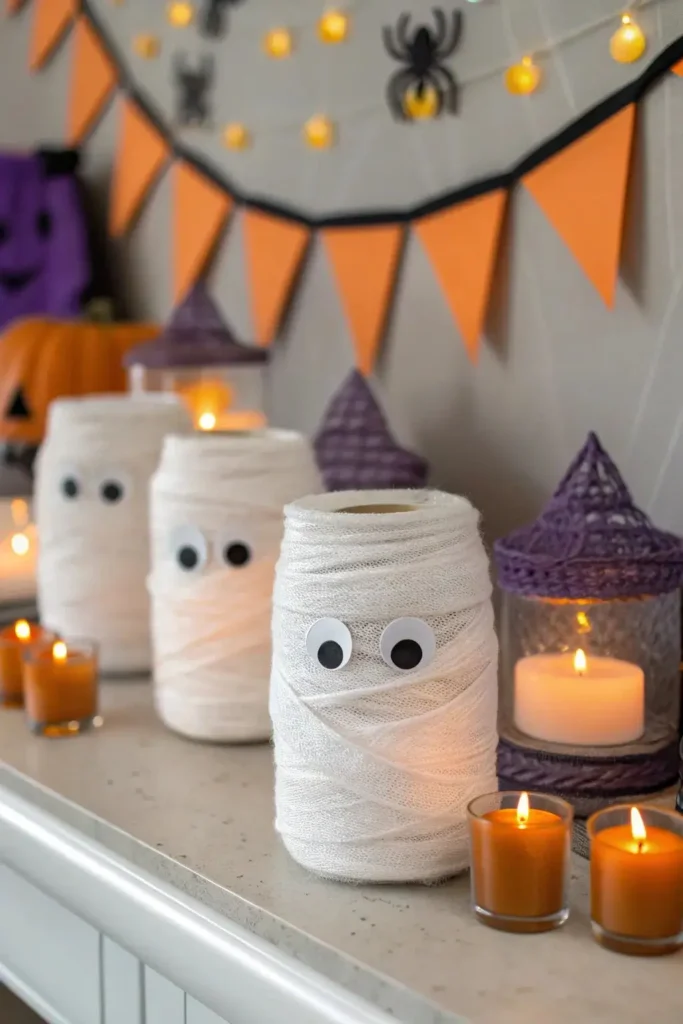
Image credit: Bambrise
Cute and spooky mummy jars that double as decorations or containers for treats in the classroom.
How to make:
- Take empty glass jars (mason jars work well) and wrap them in white gauze, tissue, or strips of cloth, leaving small gaps for eyes.
- Secure the ends with glue or tape so the wrapping stays in place.
- Add googly eyes or draw eyes with a marker in the gaps to create a mummy face.
Paper Plate and String Spider Web
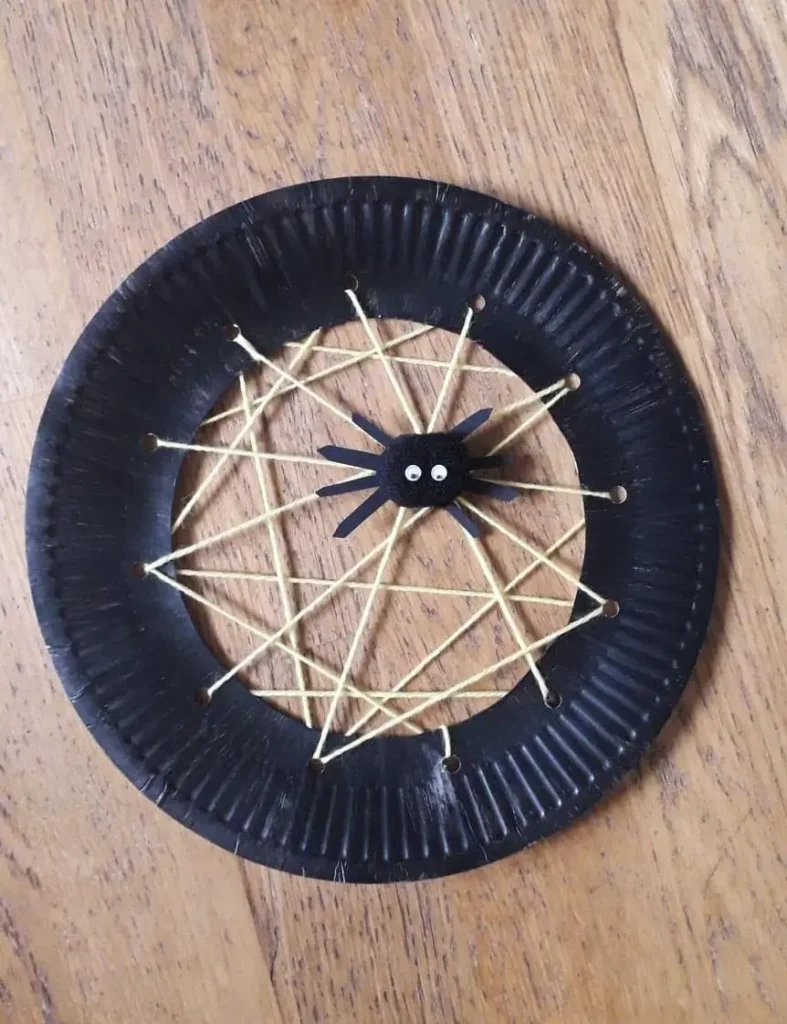
Image credit: Taty crea
A simple and fun spider web craft using a paper plate and string, perfect for hanging in classrooms.
How to make:
- Hang on walls or from the ceiling to add a spooky Halloween touch.
- Take a paper plate and cut out the center, leaving just the rim to form the web frame.
- Punch small holes evenly around the rim.
- Thread string or yarn through the holes, weaving a web pattern across the plate.
- Optional: Add a small paper or pine cone spider to hang in the center.
Paper Cup Hanging Ghosts
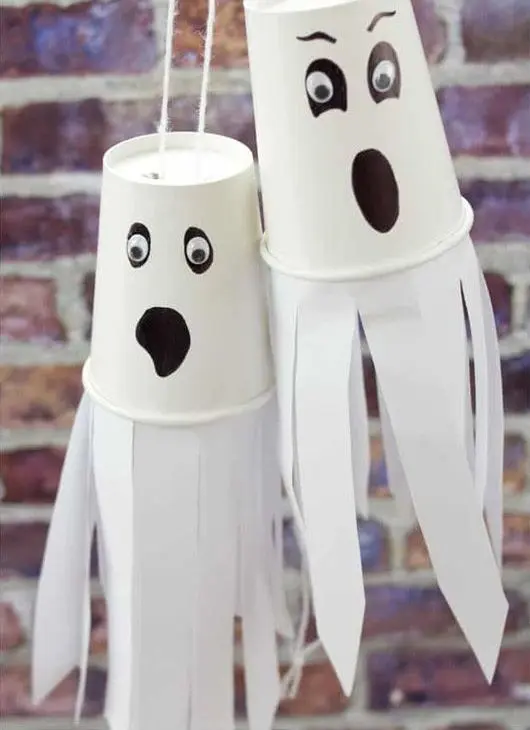
Image credit: Tracy Lefferts
Adorable floating ghosts made from paper cups, perfect for classroom ceilings or windows.
How to make:
- Take a small paper cup and cover stick strips of tissue paper inside the cup to form the ghost’s body.
- Draw or stick on eyes and a mouth with a marker or paper cutouts.
- Attach a piece of string to the top of the cup to hang the ghost from the ceiling or a curtain rod.
Paper Plate Pumpkin
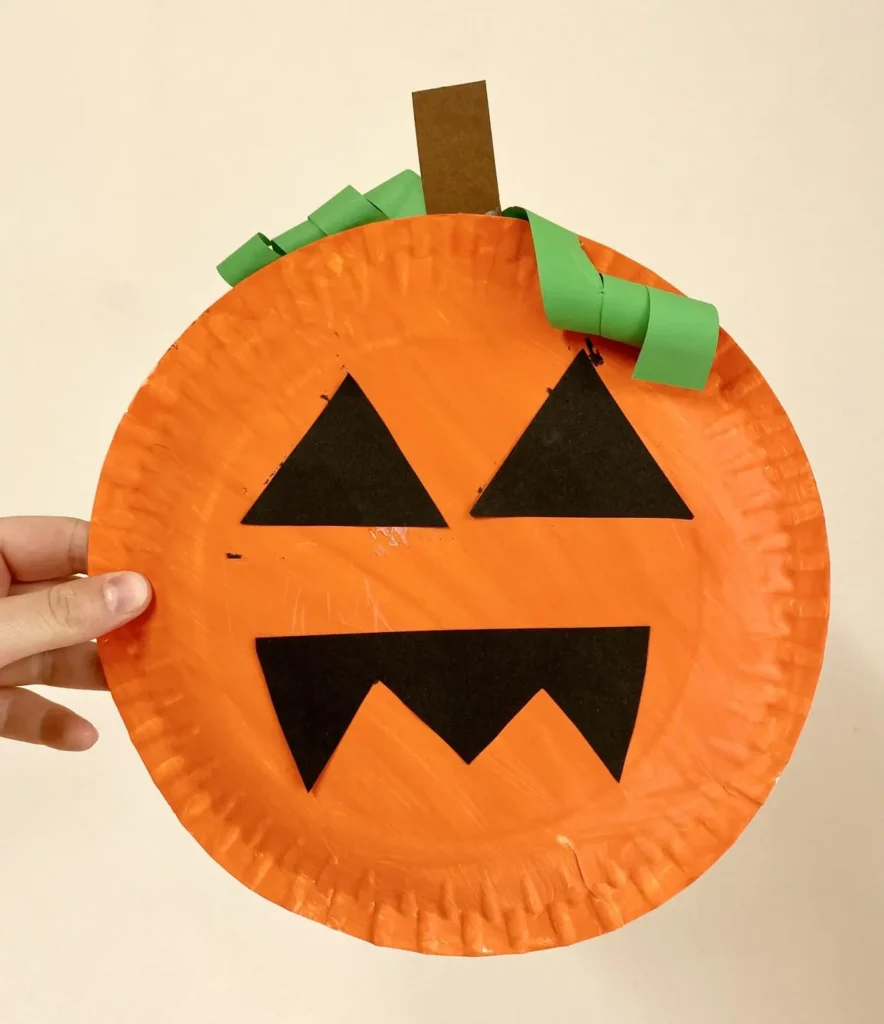
Image credit: WendyGo
A cute and easy pumpkin decoration made from paper plates, perfect for classroom walls or bulletin boards.
How to make:
- Take a paper plate and paint or colour it orange to form the pumpkin body.
- Cut out green paper or cardstock for the stem and leaves, and glue them to the top of the plate.
- Draw a face with markers or cut black paper eyes and mouth to make a jack-o’-lantern.
Green Egg Carton Witch
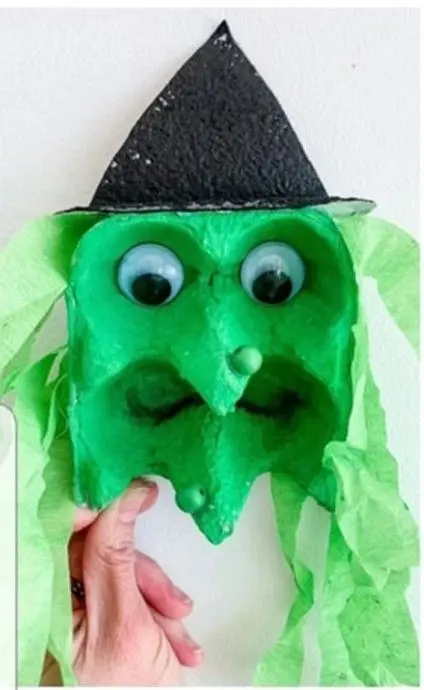
Image credit: Alejandra Correa
A fun and whimsical witch craft made from recycled egg cartons, perfect for classroom tables or shelves.
How to make:
- Cut an egg carton cup to form the witch’s face and paint it green.
- Use black paper or cardstock to make a pointed hat and attach it to the top.
- Add facial features with markers, googly eyes, or small paper cut outs.
- Attach tissue paper for hair.
Handprint Witches on Broomsticks
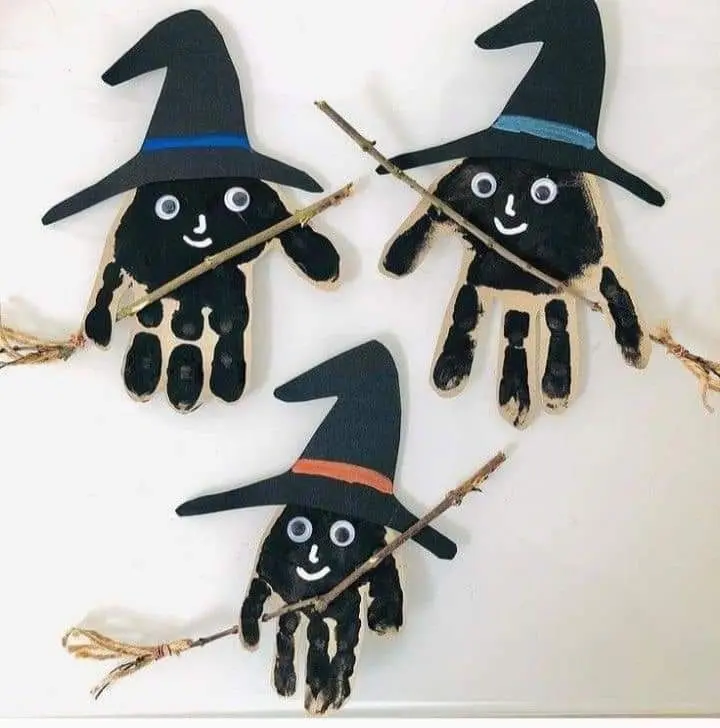
Image credit: Claudia Merlani
Adorable witches made from kids’ handprints, perfect for classroom walls, bulletin boards, or Halloween displays.
How to make:
- Paint the child’s hand with green, orange, purple or black paint and press it onto paper to make the witch’s body.
- Draw or glue on a twig and string broomstick.
- Add a paper hat, googly eyes, and facial details with markers or cutouts.
Colored Paper Plate Witch Hats with Glitter Stars
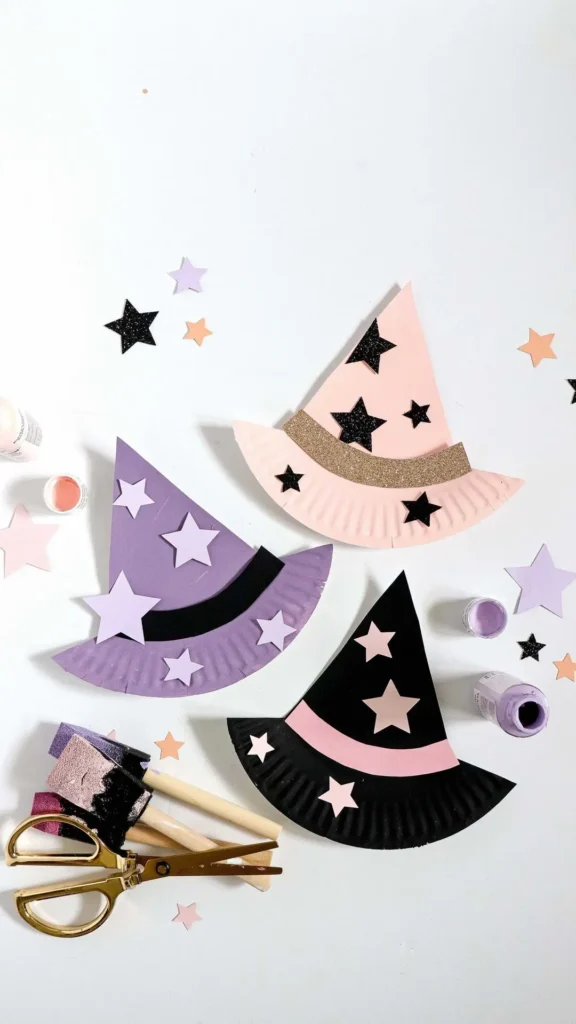
Image credit: J G
Fun and sparkly witch hats made from paper plates, perfect for decorating classrooms for Halloween.
How to make:
- Cut a paper plate into a cone shape to form the witch hat and secure the edges with glue or tape.
- Paint or cover the hat with colored paper.
- Decorate with glitter, stickers, or paper stars to make it magical.
- Add a ribbon or paper band around the base of the cone for extra detail.
Halloween Painted Leaves
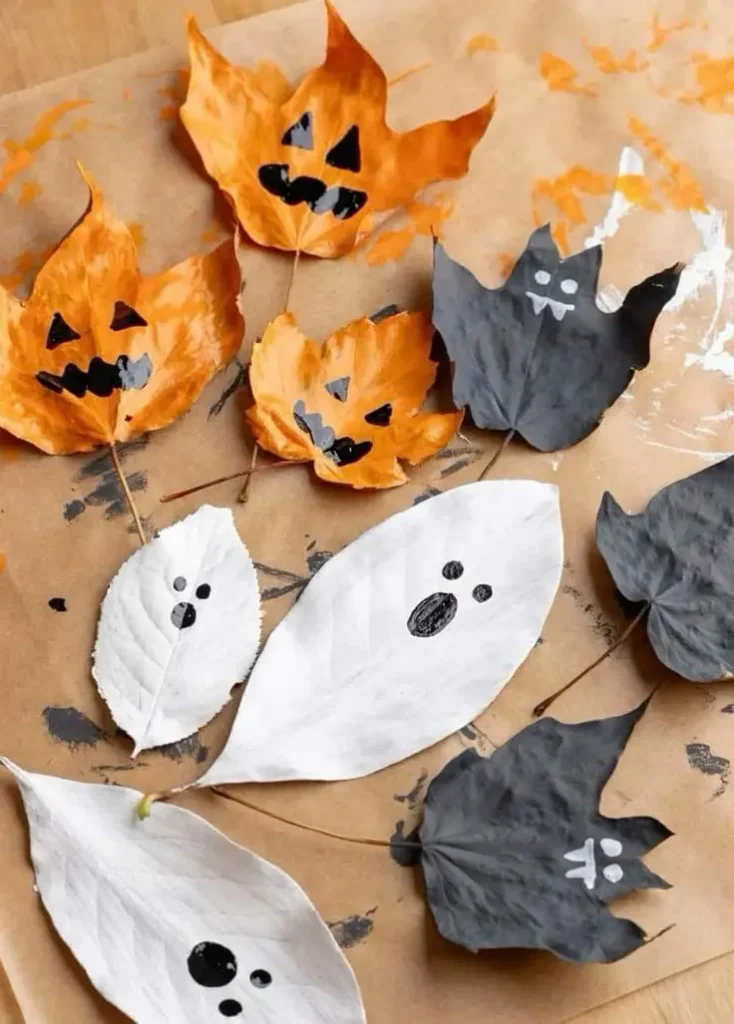
Image credit: TBQT
Simple and colorful autumn leaves decorated with spooky Halloween designs, perfect for classroom displays or crafts.
How to make:
- Collect fallen leaves from outside, dry if necessary.
- Paint the leaves with Halloween colors like orange, black, purple, or green.
- Add details such as faces, bats, ghosts, or spider webs using markers or fine brushes.
Egg Carton Ghosts
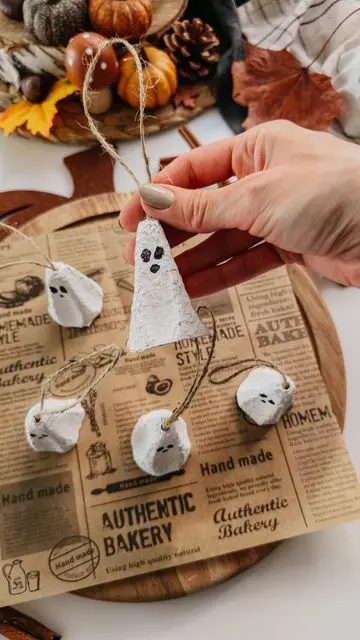
Image credit: Mirkka Harmainen
Tiny, spooky ghosts made from the center cups of recycled egg cartons—perfect for classroom tables or hanging decorations.
How to make:
- Cut out the pointed centers of an egg carton.
- Paint them white to create ghost bodies.
- Add googly eyes or draw eyes and a mouth with a marker.
- Attach a small string or thread to the top to hang the ghosts from ceilings or branches.
Doily Ghosts
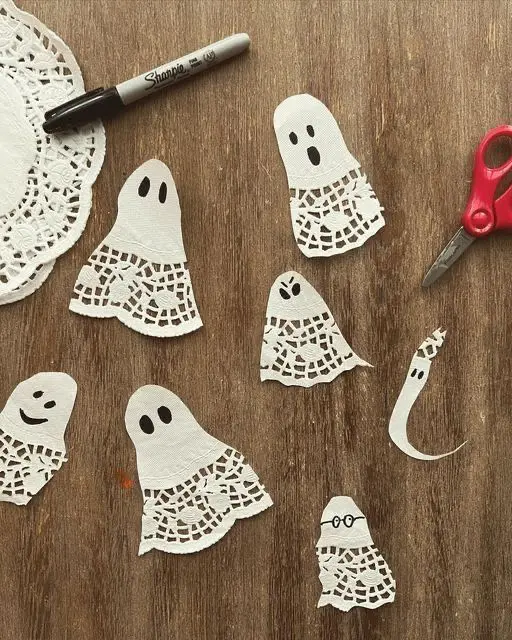
Image credit: Norma Bergeron
Delicate ghosts made from paper doilies, perfect for sticking or hanging in classrooms or from windows.
How to make:
- Cut a paper doily into a ghost shape.
- Draw or stick on eyes and a mouth with a marker or small paper cutouts.
Cork Bats
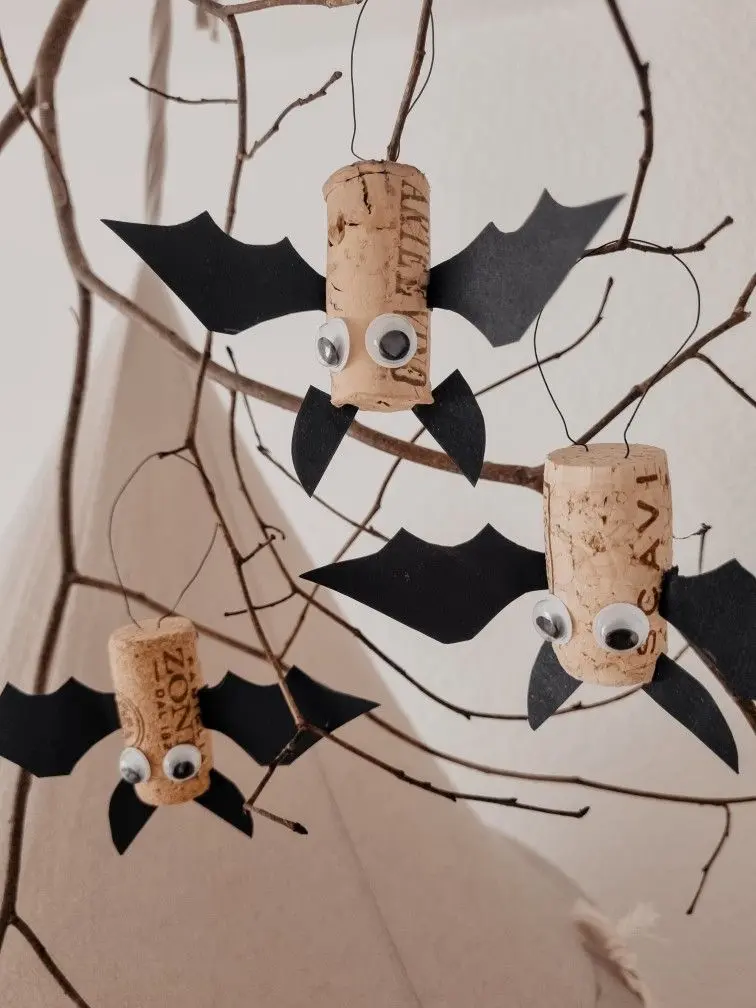
Image credit: Dashausundich
Cute and spooky bats made from wine corks, perfect for classroom tables or Halloween displays.
How to make:
- Use a wine cork for the bat’s body.
- Cut bat wings from black cardstock or construction paper and attach them to the sides of the cork with glue.
- Add googly eyes or draw eyes with a marker on the front of the cork.
Pine Cone Spider
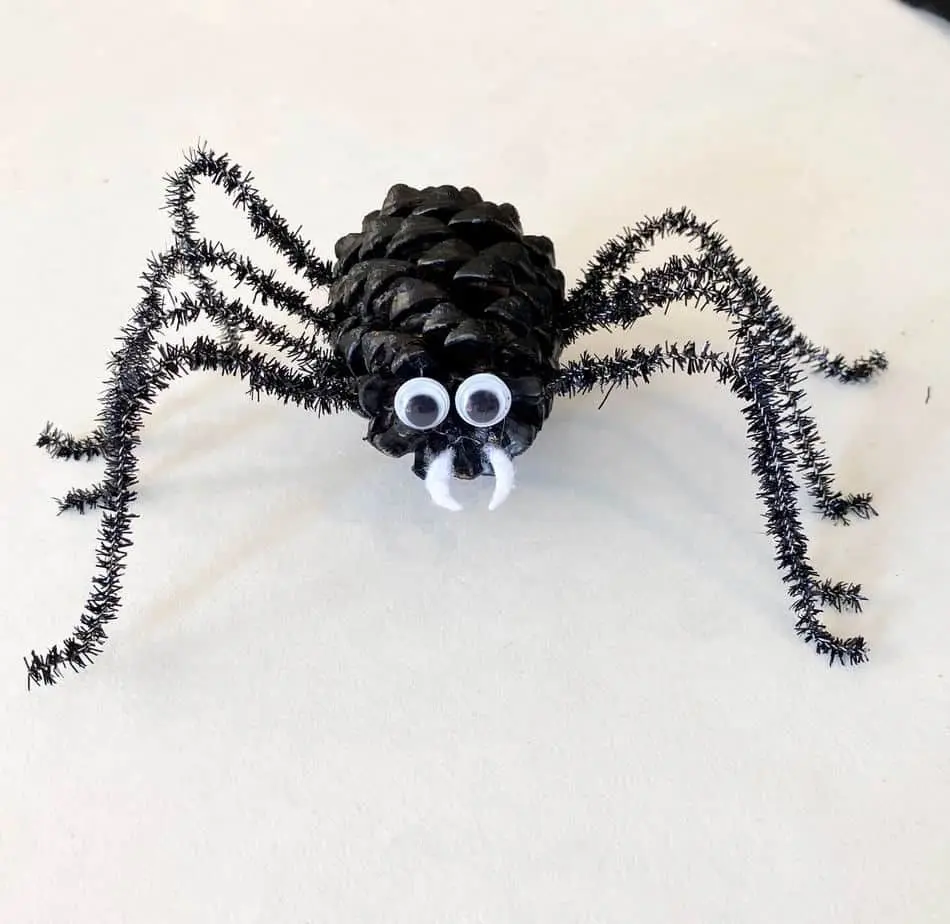
Image credit: Manda Panda Projects
A fun and spooky spider made from pine cones, perfect for classroom tables, shelves, or Halloween displays.
How to make:
- Collect a medium-sized pine cone to serve as the spider’s body.
- Cut 8 pipe cleaners for legs and attach them to the sides of the pine cone, bending them to create a realistic spider shape.
- Add googly eyes or draw eyes on the top of the pine cone.
- Optional: Use black paint to make the spider darker and spookier.
Pine Cone Owls

Image credit: Boireau Agnes
Cute woodland-inspired owls made from pine cones, perfect for Halloween or autumn classroom decorations.
How to make:
- Collect small to medium pine cones.
- Use felt, paper, or cardstock to cut out wings, a beak, and eyes.
- Glue the wings to the sides, the beak to the front, and eyes above the beak.
- Add small googly eyes to complete the owl face.
Pine Cone Bats
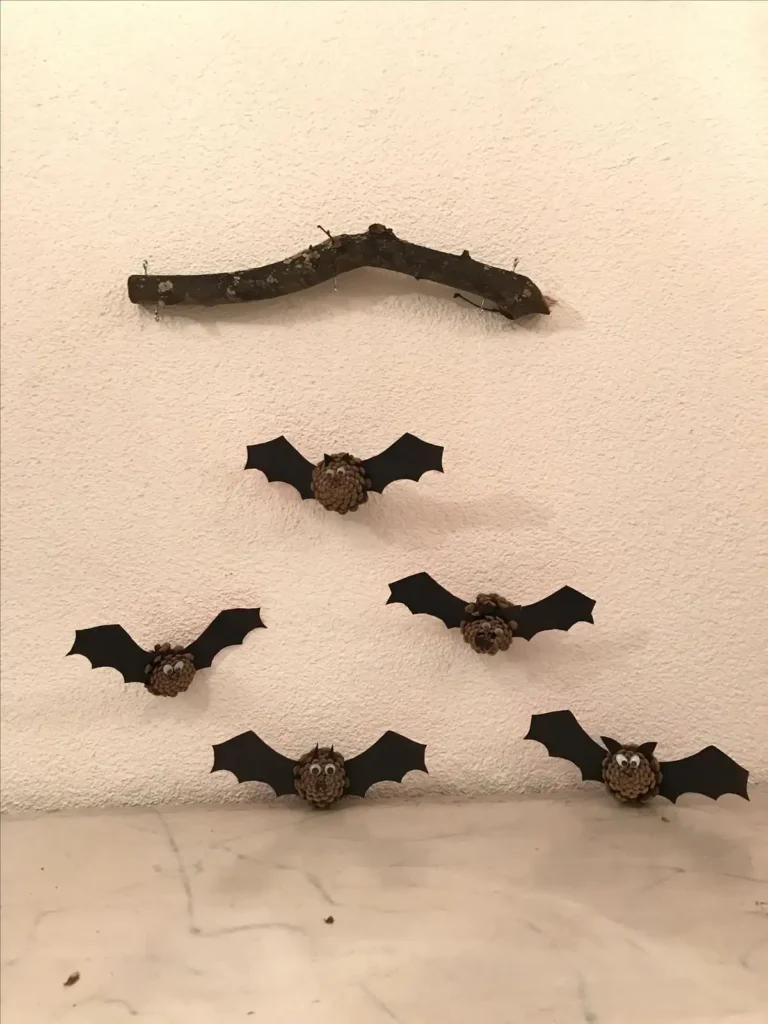
Image credit: Uelfet
Adorable and spooky bats made from pine cones—perfect for tabletop or shelf decorations in the classroom.
How to make:
- Collect small to medium pine cones.
- Cut bat wings from black cardstock or construction paper.
- Attach the wings to the sides of the pine cone using glue.
- Add googly eyes to create a face.
- Optional: Attach a string to hang them from the ceiling or place them on desks and shelves.
Coffee Filter Bats
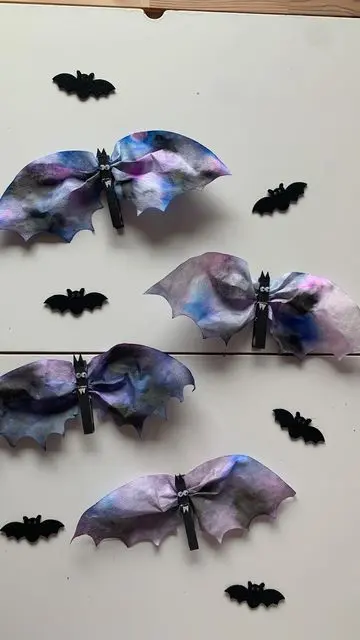
Image credit: Petra Brenner
Lightweight and fun bats made from coffee filters—perfect for hanging in classrooms or from ceilings.
How to make:
- Flatten coffee filters and color them using paint, markers, watercolor, or spray paint.
- Pinch the center of the filter and secure with a small clothespin.
- Cut wings from black construction paper or use the coffee filter edges as wings by shaping them.
- Add googly eyes or draw eyes with a marker.
- Hang the bats from string or tape them to walls for a floating, flying effect.