The Fashion Blogger’s Guide to Prompting: How to Create Great AI Images
When I started working on this post I was a lot more excited about what AI can do in the space of image creation. The artistic side of my brain felt like it was going to explode with excitement! However, using AI images on a blog that you hope to monetize with an advertiser like Mediavine is precarious territory. These is a bit of an unsure future for those blogs, with multiple factors coming in to play. Mediavine has to consider user experience when considering who they allow onto their program, but they are also driven to maximize their own profits. How they, and other companies like them will balance the different needs of their different stakeholder groups is an ongoing process. Relying too hevily on AI, or indeed having completely AI generated sites (I’ve never dabbled, but I have heard about resources like Content Goblin in the Jesse Cunningham sphere) does seem like a step too far for Mediavine, in most cases.
So, before we get into AI prompting, I really want to focus on the cautionary aspect of using AI images if your site is, or you intend for it to be monetized with Mediavine or Raptive.
Mediavine has stated their position as follows
“While generative AI is rapidly evolving, Mediavine recognizes the need to take a stand and shape the future of this new technology, the publishing community and the open web itself.”
“We do not monetize low-quality, mass-produced, unedited or undisclosed AI content that is scraped from other websites.
We will not tolerate publishers using AI to create untested recipes or any other form of low-quality content that devalues the contributions of legitimate content creators.
This policy is already incorporated into Mediavine’s thorough vetting processes undergone by all publishers applying for our services.
We’re also developing faster, automated tools to help us identify low-quality, mass-produced AI content across the web.
If previously-vetted websites begin producing lower quality content instead, we will catch it and take immediate action.”
They endorse the use of AI for alt tags, but that’s about it. The rest ends up pretty vague because “low value” content is a subjective, undefined term.
I often run the written content of other successful blogs through a checker to indulge my curiosity. Usually the conclusion is that it is “hybrid” content – either human edited or a reasonable amount of specificity in the prompting.
Without deviating too far from the focus of this article, which is image creation, I will add that where I’ve found AI to be the biggest changer is coding html for my website. I have no background in coding, and I can achieve so much more by prompting it to code for me.
OK, so without further a do, lets get into the nitty gritty of image prompting.
Tip 1: Use multiple image generation models.
They really do create entirely different images in both quality and stylistically, as well as speed of image generation, available tools and user control.
The hack to using different models though, is looking at how they have expanded your description and incorporating or modifying that in another image generation model.
For example, I just asked Gemini to create an image of a cat in a hat:
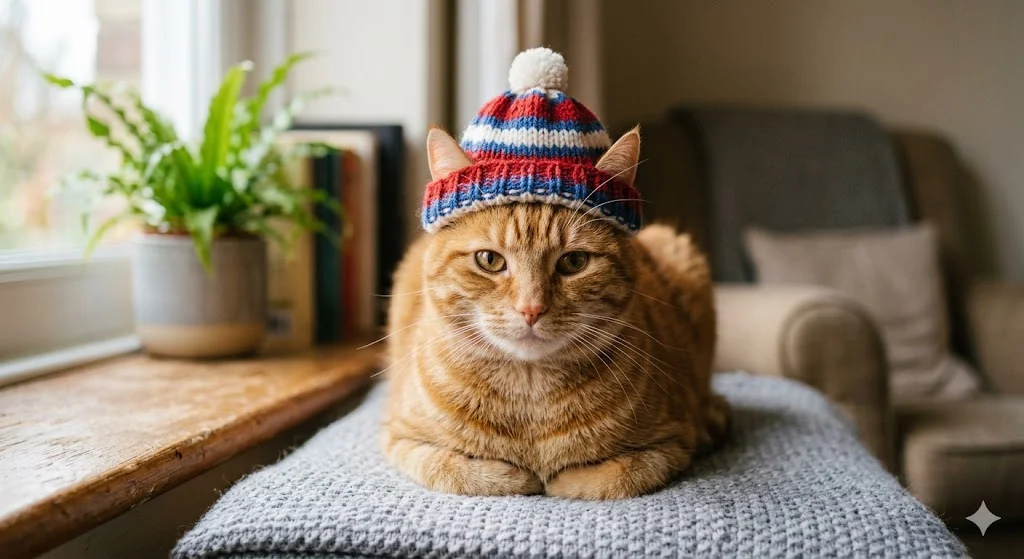
When I submit the prompt, Gemini sends When I submit the prompt, Gemini sends a technical prompt to an image generation model. When I prompted Gemini to create an image of a “cat in a hat,” Gemini processed that through it’s internal systems to create a more descriptive, expanded prompt. However, to my knowledge (and please comment if there is a way I don’t know about), the exact internal system instructions are inaccessible to users.
We’ve all seen how AI is popping up in our feeds lately. Whether you’re looking to create mood boards, visualize an outfit before you buy it, or just add some unique artistic flair to your posts, knowing how to talk to an AI generator is a total game-changer.
If you’ve been curious about how to get those high-end, editorial-looking images without the “AI weirdness,” this guide is for you. Here is the breakdown of how to write prompts that actually look like fashion photography.
Writing great prompts for a fashion blog is all about balancing the technical details of the clothing with the mood of the setting. AI models respond best when you move from general terms (like “dress”) to specific textures, cuts, and lighting.
Here is a guide to structuring your prompts for high-end results:
1. The “Anatomy” of a Perfect Fashion Prompt
The secret to a great image isn’t luck; it’s a formula. When you’re writing your prompt, try to include these five elements in order:
[Model Details] + [The Full Outfit] + [The Setting] + [Lighting Style] + [Camera Specs]
Or you can use this similar formula below:
[Subject/Model Description] + [Detailed Outfit Breakdown] + [Environment/Setting] + [Lighting & Camera Specs] + [Style/Mood]
Example:
- Basic: “A woman wearing a summer dress in Santorini.”
- Pro: “A professional fashion model with a sleek bun, wearing a white linen backless maxi dress with gold hardware details, standing on a whitewashed balcony overlooking the Aegean Sea. Golden hour lighting, high contrast, shot on 35mm lens, f/1.8, cinematic grain, editorial style for Vogue.”
2. Master the Fashion Vocabulary
AI understands specific industry terms. Use these to get exactly what you want:
| Category | Words to Use |
| Fabrics | Silk, tulle, oversized knit, distressed denim, leather, organza, sequins, velvet. |
| Cuts/Fits | A-line, oversized, tailored, high-waisted, tiered, silhouette, asymmetrical. |
| Photography | Street style, editorial, lookbook, studio lighting, candid, wide shot, close-up detail. |
| Aesthetics | Minimalism, avant-garde, “Old Money,” streetwear, cottagecore, cyberpunk. |
3. Lighting is Everything
The “vibe” of your blog depends on the light. Specify it to avoid flat, boring images:
- Golden Hour: For warmth, romance, and soft shadows (great for boho or summer styles).
- High-Key Studio: For clean, professional lookbook styles with no shadows.
- Neon/Cinematic: For “Boho-Punk” or edgy urban street style.
- Dappled Light: For a high-end, artistic “shadows of leaves” effect.
4. Pro Tips for Realistic Results
- Avoid the “AI Face”: Add terms like “natural skin texture,” “candid expression,” or “symmetrical features” to keep the model looking human.
- Fixing the Hands: Hands are tricky for AI. Prompt your model to do something specific: “hands in coat pockets,” “holding a coffee cup,” or “adjusting sunglasses.”
- Think Like a Photographer: Mentioning camera gear helps the AI understand the depth of field. Use phrases like “shot on 35mm film,” “f/1.8 aperture” (for a blurry background), or “wide-angle lens.”
Creating Prompt Templates
The level of detail in your prompts will determine the control you have over the content of your images. Rather than leave it to luck, you can increase the detail in your prompts to improve the quality of your images. These first examples are of simple prompts used in gemini: I have included the image with the prompt below.
Copy and paste these into your generator of choice and swap out the colors or clothes! I have included Gemini Examples:
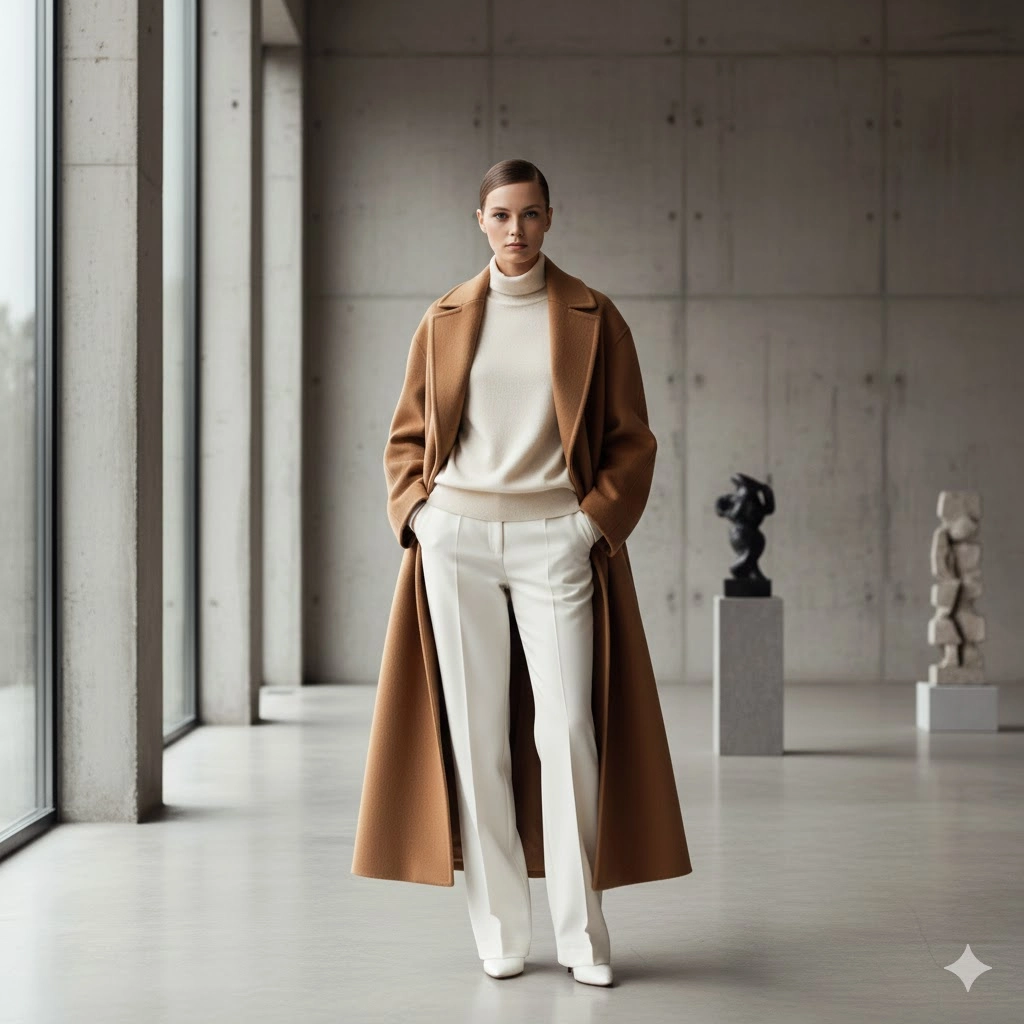
- The Minimalist: “Professional model, slicked-back bun, wearing an oversized camel wool coat and white trousers, standing in a concrete art gallery, soft natural window light, architectural aesthetic, 50mm lens.”
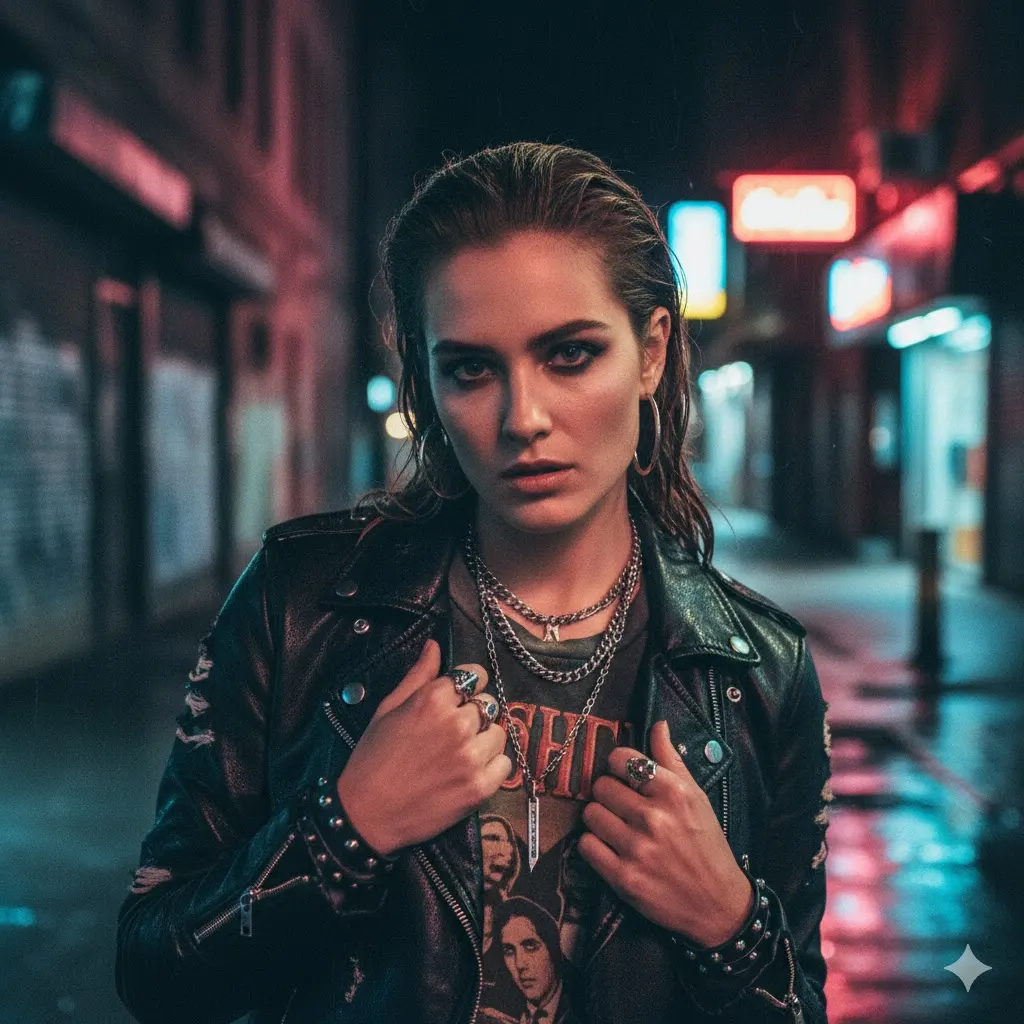
- The Urban Edge: “Close-up of a model with silver jewelry, wearing a distressed leather jacket and graphic tee, urban street setting at night, neon reflections, cinematic lighting, grainy film photography.”
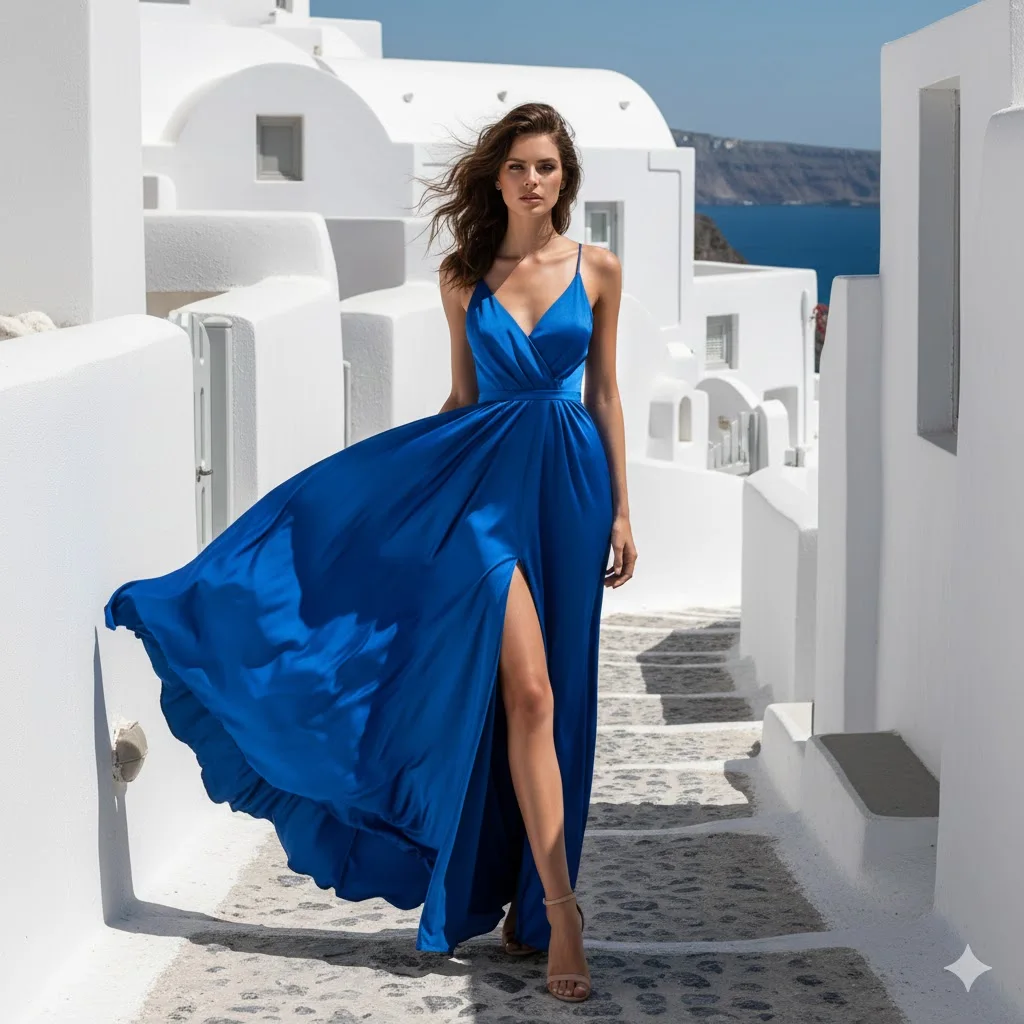
- The Vacation Vibe: “Full body shot, model in a flowing blue silk maxi dress, whitewashed Santorini background, harsh midday sun with high contrast shadows, sharp focus, fashion editorial style.”
Now, let’s see some examples of more detailed prompts:
1. The Minimalist (Architecture & High Fashion)
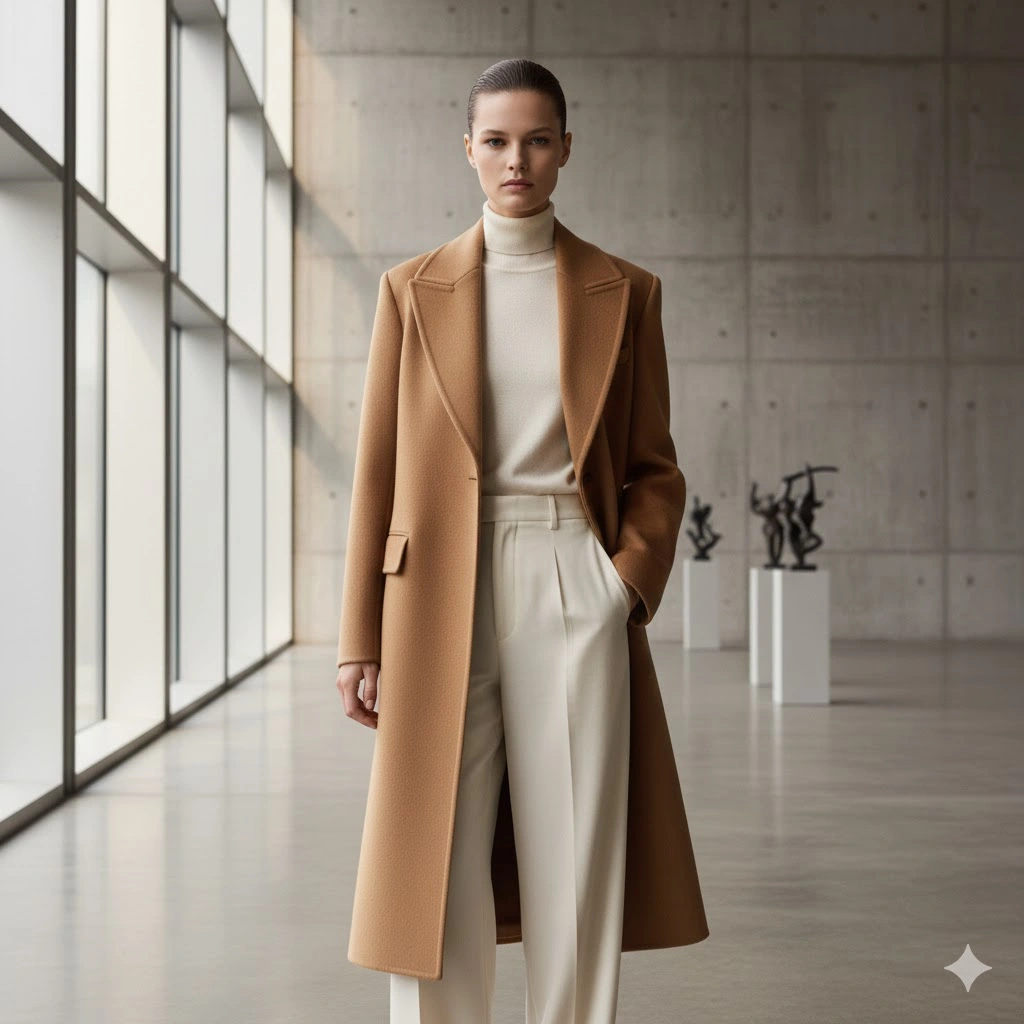
Prompt: “Editorial fashion photography of a professional model with a tight, high-gloss slicked-back bun and minimalist makeup. She is wearing a structured, heavyweight camel wool overcoat with sharp lapels and high-waisted wide-leg ivory silk trousers. She is standing in a brutalist concrete gallery with floor-to-ceiling windows. Soft, diffused natural light creates gentle gradients on the walls. 8k resolution, shot on Hasselblad H6D, 50mm lens, f/2.8, hyper-realistic fabric textures, clean lines, serene atmosphere.”
2. The Urban Edge (Mood & Texture)
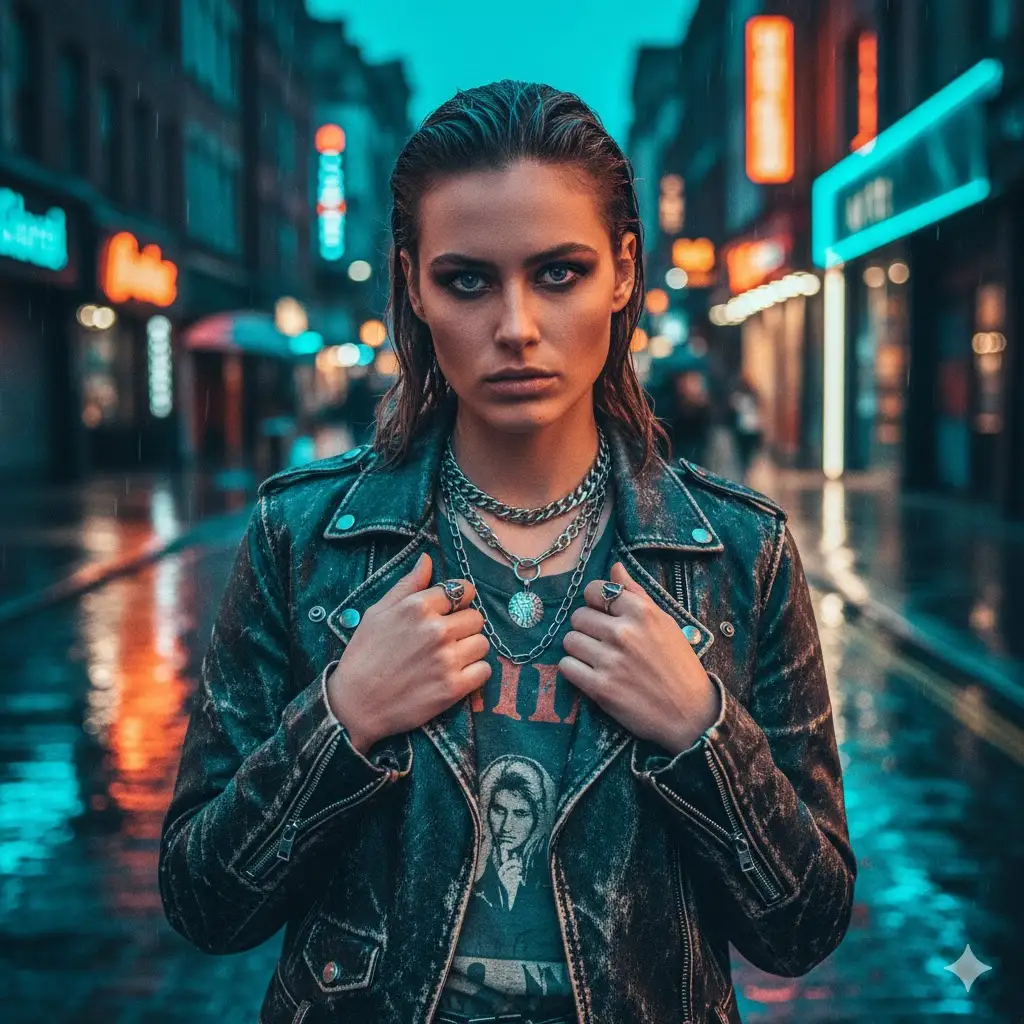
Prompt: “Hyper-realistic street style photography, close-up portrait of a model with edgy silver hardware jewelry and layered chains. She is wearing a vintage-wash distressed black leather biker jacket over a faded charcoal graphic band tee. Setting is a rain-slicked Soho street at night. Vibrant blue and pink neon signs reflect in the puddles and on the jacket’s leather grain. Cinematic teal and orange color grading, 35mm film grain, shot on Leica M11, f/1.4, bokeh background, moody and rebellious.”
3. The Santorini Dream (Light & Movement)
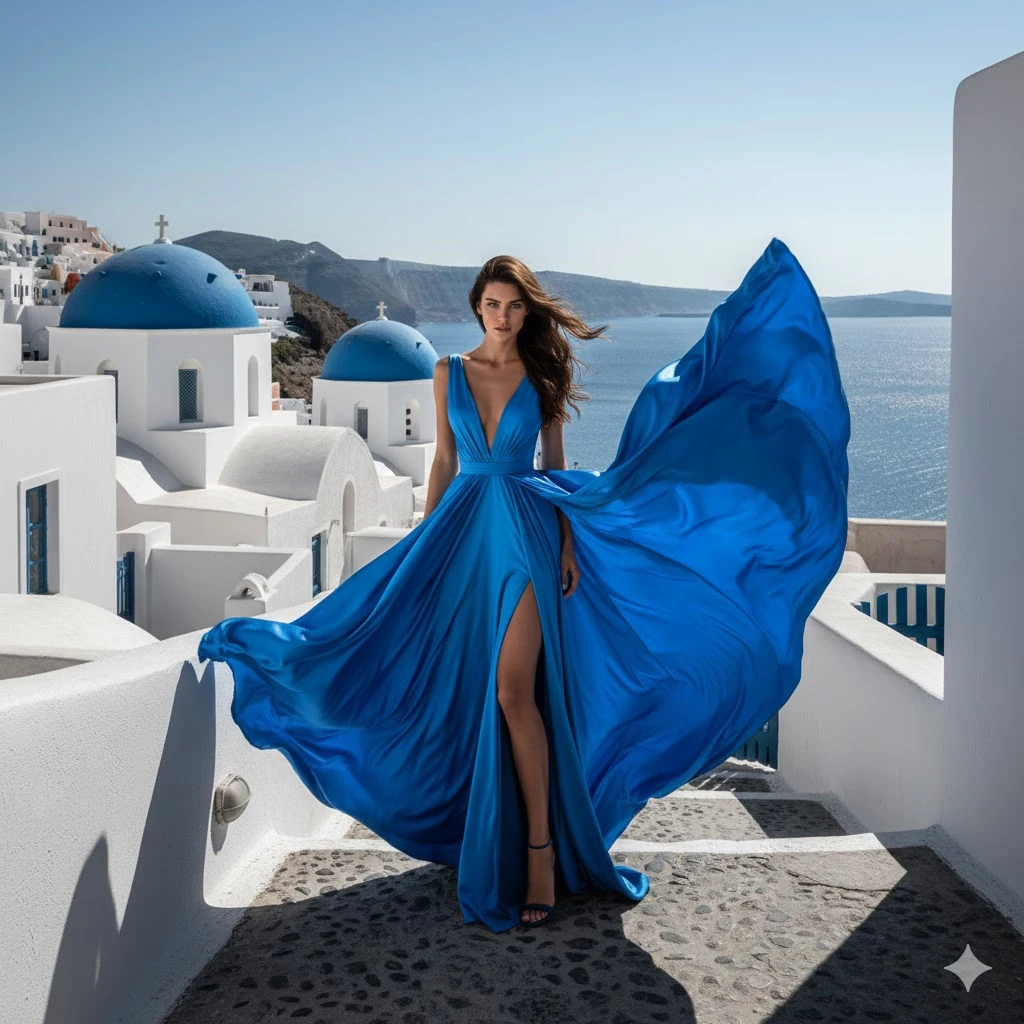
Prompt: “High-fashion editorial, full-body shot of a model in a voluminous, flowing cobalt blue Italian silk maxi dress caught in a gust of wind. The setting is a whitewashed Oia balcony with a deep blue domed church in the distance. Harsh, direct midday Mediterranean sun creating sharp, dramatic high-contrast shadows. Sharp focus on the silk’s sheen and ripple. Shot on Phase One XF, 80mm lens, f/11 for deep depth of field, vivid cerulean tones, high-fashion magazine aesthetic.”
Finding an image you love and “reverse-engineering” its style is one of the smartest shortcuts in AI fashion blogging. Instead of guessing, you let the AI tell you exactly which camera, lighting, and fabric keywords created that look.
Here is a blog-style breakdown of how to master Reverse Prompt Engineering.
The Ultimate Hack: Reverse-Engineer Your Favorite Fashion Styles
Found an image on Pinterest or a high-end lookbook and see a photo with that perfect vibe—the soft grain, the specific glow of the lighting? If you want to recreate it for your own blog, you can reverse engineer the “recipe” using AI.
You can use AI to “read” the photo and write the prompt for you. Here is the 3-step process to steal the style (legally!) and make it your own.
Step 1: Use an “Image-to-Prompt” Tool
Several AI tools are designed specifically to analyze an image and spit out the text prompt that would describe it.
- Midjourney’s
/describecommand: This is the gold standard. You upload a photo, and it gives you four different detailed prompts that describe the lighting, camera gear, and aesthetic. - Leonardo.ai’s “Image Guidance”: You can upload a reference image to influence the style and strength of your next generation.
- CLIP Interrogator: A free tool (often found on Hugging Face) that breaks an image down into specific artist influences and technical tags.
Step 2: Identifying the “Style DNA”
Once the AI gives you a description, look for the technical keywords that appear. These are the “DNA” of the style. For a fashion blog, you’re looking for:
- Lighting: “Volumetric lighting,” “high-key,” “rim lighting,” or “dappled sunlight.”
- Film/Camera: “Shot on Kodak Portra 400,” “35mm film grain,” or “f/1.8 bokeh.”
- Texture: “Hyper-realistic silk sheen,” “heavyweight wool texture,” or “distressed leather.”
Step 3: The “Remix” (Swap the Subject)
Now for the magic. You take that “Style DNA” and swap out the subject for your own.
The Original Style Prompt (From AI):
“A 1990s vintage film photo of a girl in a red dress, shot on 35mm, grainy texture, blurry city background, cinematic lighting.”
Your Remix:
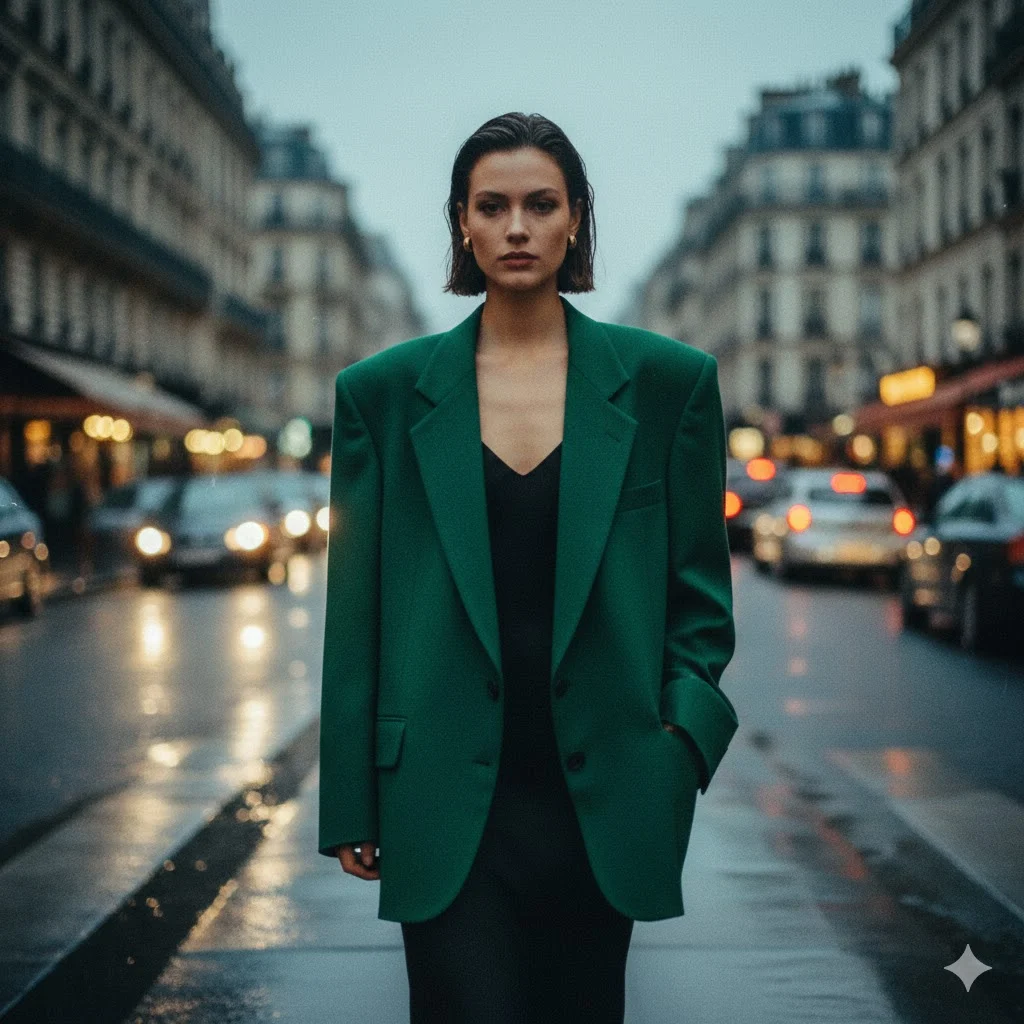
“A 1990s vintage film photo of a model in an oversized emerald blazer, shot on 35mm, grainy texture, blurred Parisian street background, cinematic lighting.”
By keeping the technical “tail” of the prompt (the film, texture, and lighting) but changing the “head” (the clothes and location), you maintain a consistent brand aesthetic across all your images.
The “Lazy Girl” Hack: How to Reverse-Engineer Any Fashion Photo
Since Gemini can “see” images, you can simply upload a photo and ask it to break down the DNA of the shot into our perfect 5-part prompt formula.
The Magic Prompt
Upload your reference photo to Gemini and paste this exact prompt:
“Analyze this image and break it down into a detailed AI image generation prompt. Use this specific structure: [Subject/Model Description] + [Detailed Outfit Breakdown] + [Environment/Setting] + [Lighting & Camera Specs] + [Style/Mood]. Be as technical as possible, especially with the camera lens, lighting type, and fabric textures.”
AI “No Go” Zones For Your Blog
While AI is an incredible tool for mood boards and creative backgrounds, it has serious “off-limit” zones. If you use it in the wrong context, you risk losing the trust of your readers—and in the fashion world, trust is everything.
Here is the “Red Flag” checklist to keep at your desk before you hit publish.
⚠️ The Fashion Blogger’s “AI Don’ts”: A Warning List
- DON’T use AI to review actual products. If you’re talking about a specific dress from a brand, you must show the real garment on a real body. AI “hallucinates” details like stitching, button placement, and fabric weight. Using a fake image for a real product review is considered deceptive and can even lead to legal trouble for misleading advertising.
- DON’T hide the fact that it’s AI. Transparency is the new cool. If your image is generated, add a simple tag like
#AIassistedor a small disclaimer. Readers feel “cheated” when they find out later that a photo they loved isn’t real. - DON’T replace “Real Diversity” with “Digital Diversity.” One of the biggest mistakes brands make is using AI to create diverse models instead of actually hiring diverse talent. It can come across as performative and “tokenizing.” Use AI to expand your creative horizons, not to avoid working with real people.
- DON’T ignore the “Law of Physics.” AI loves to add a sixth finger, a floating strap, or a heel that disappears into the pavement. These “glitches” shatter the high-end editorial vibe instantly. Always zoom in and do a “sanity check” on the limbs and accessories before posting.
- DON’T use real celebrities or designers in your prompts. Using a famous person’s likeness (e.g., “Bella Hadid wearing a neon suit”) can land you in a world of copyright and “Right of Publicity” lawsuits. Stick to generic descriptions of models to keep your blog safe.
- DON’T let AI define your “Eye.” AI is trained on what is already popular. If you rely on it too much, your blog will start looking like everyone else’s. Use it to build your world, but make sure the styling and the vision are uniquely yours.
The Bottom Line
AI should be your intern, not your identity. Use it for the “impossible” shots—like a high-fashion shoot on Mars—but keep the “personal” in your personal style by staying real where it matters most.
🛑 The Mediavine Stance: Why They’re Wary of AI
Mediavine’s core mission is “Creator-First.” They view the flood of AI content as a direct threat to the independent bloggers who actually spend time styling, shooting, and writing.
1. The “Quality” Termination Clause
In late 2024 and throughout 2025, Mediavine began aggressively terminating publisher accounts for “overuse of artificially created content.” While much of this was focused on AI-written text, their policy explicitly includes undisclosed or low-quality AI images.
- The Risk: If their third-party quality tools flag your site as “mass-produced” or “low-value,” you can be kicked out of the network with very little warning.
2. Advertiser Pressure
Mediavine doesn’t just hate AI for fun—their advertisers do. High-end brands (like those in the fashion and beauty space) don’t want their ads appearing next to “fake” content.
- Advertisers pay a premium for engaged, human audiences. If they feel a site is just a “content farm” of AI images, they pull their spending, which lowers the revenue for everyone in the network.
3. The “Uncanny Valley” and Engagement
Mediavine’s “Journey” and main ad tech are built on Engagement Sessions. AI images often have a high “bounce rate”—people see the weirdly perfect faces or warped fingers and leave the site immediately. Lower engagement means lower ad revenue, which makes your site less valuable to Mediavine.
⚠️ Mediavine’s “Don’ts” for AI Images
If you want to keep your account safe, follow these strict rules:
- DON’T use AI for featured images on every post. This is a massive red flag that your site is automated.
- DON’T use AI for product reviews. Using AI to show a “real” product you’re supposed to be reviewing is considered deceptive and a violation of their quality standards.
- DON’T hide it. Mediavine strongly advocates for transparency. If you use AI, they want you to disclose it.
- DON’T use AI for “Serviceable Content.” For example, if you’re a food blogger, using AI for recipe photos is a “hard no.” In fashion, using AI for “How-to-Style” guides is equally risky.
✅ How to Use AI Safely (The “Mediavine-Approved” Way)
Mediavine isn’t anti-technology; they are anti-replacement. They allow AI as a tool, not as the author.+1
- Mood Boards & Inspiration: Using AI to create a collage or a vibe for a post is generally fine.
- Backgrounds & Enhancements: Using AI to clean up a background or add an artistic flair to a real photo of yourself is much safer.
- The “Assistant” Rule: Use AI to brainstorm titles or alt-text (things that help the reader) rather than generating the core “meat” of the blog.
The Golden Rule:
If your blog looks like it was made by a human who actually owns a camera, you’re safe. If it looks like a curated gallery of Midjourney prompts, you’re in the “Termination Zone.”